One of our assignments on the AMI training course was to make a set of classified cards by hand. There are several concise card-making tutorials on the Internet, so I will concentrate instead on the course criteria taught to us by AMI to make/ buy an authentic and effective set of cards. (Also, the online tutorials are beautifully shot, whereas I present to you my iPhone photography shot mostly on my dining table).
The sensitive period for language is 0-5years. Once you see your child having a language explosion, you could offer him classified cards to extend his vocabulary. Classified cards (also called three-part cards) introduce complex vocabulary in a simple way: by naming things, then describing their properties.
1. Select the topic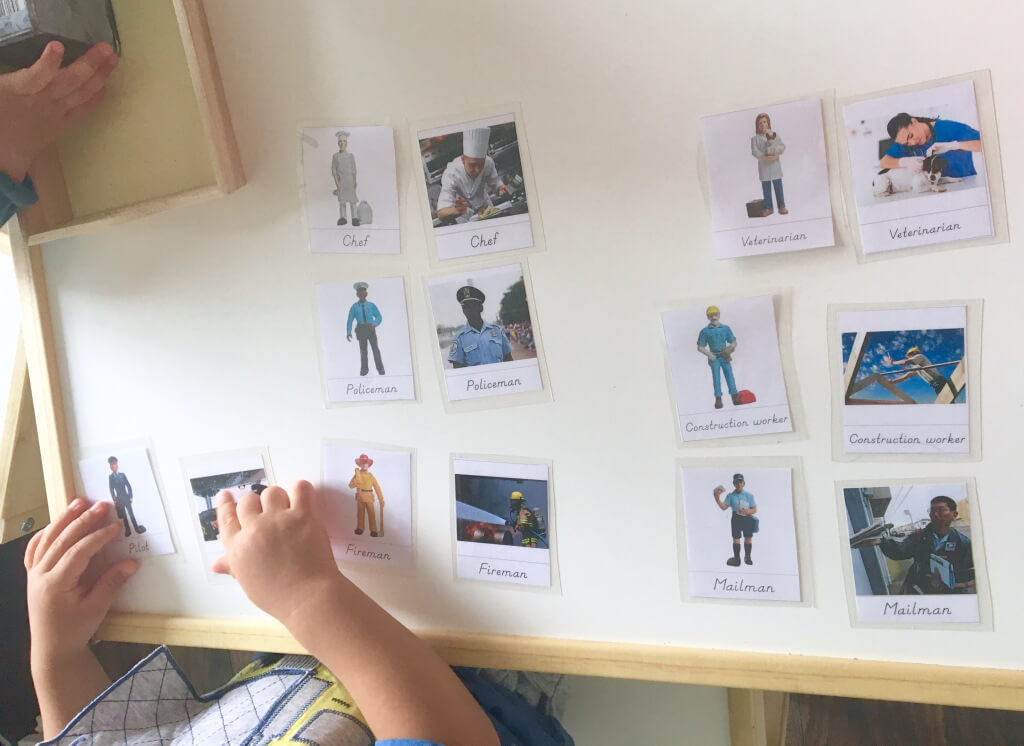
Only one criteria here: the topic should be relevant to your child’s interests. There is no point offering the most exquisite three-part cards if your child has zero interest in the topic.
Some possible starter topics that many children seem to love:
- Clothes (great with a self-dressing/ care of self unit or if you are setting up a Montessori bedroom)
- Household items, or types of objects belonging to each room
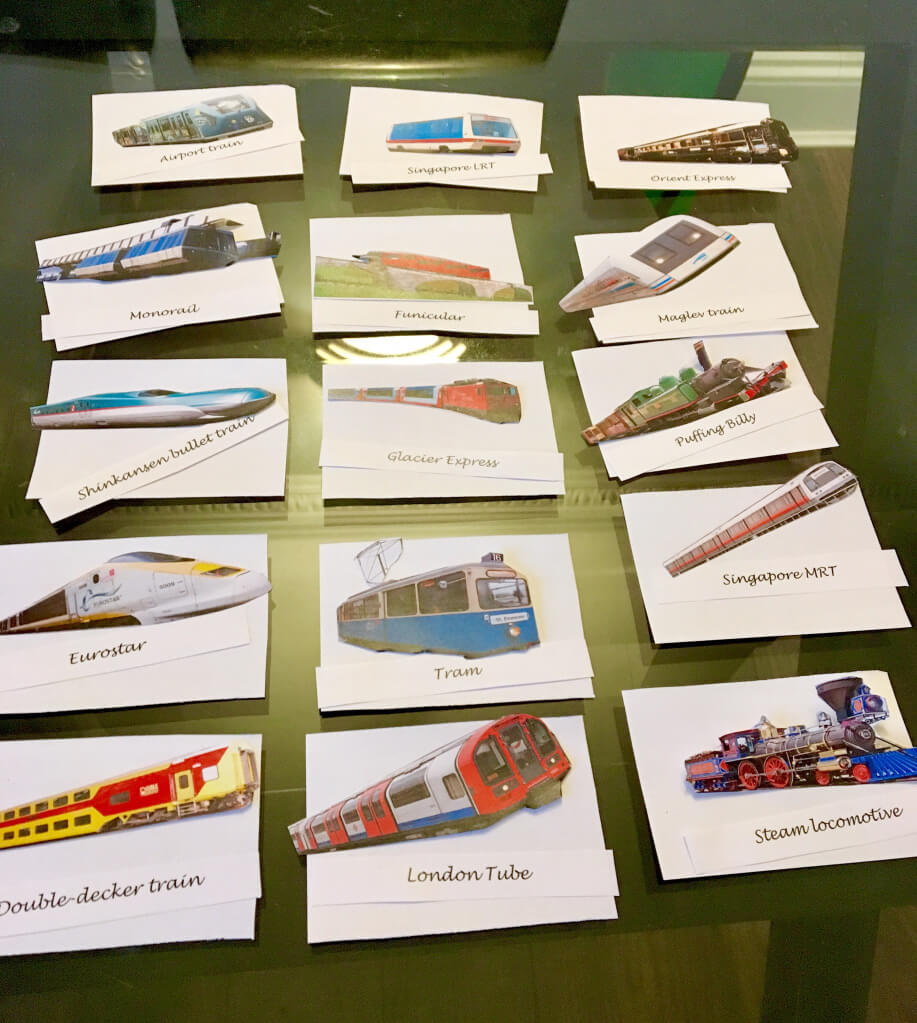
- Vehicles (a wonderful set of transport cards drew my son into his new Montessori school in London and helped him connect with the environment)
- Nature: flowers, fruits, or animals
- Any topic that matches existing Toob figurine sets that you own, like World Landmarks (free download created by Lyn Hzb) or Community Helpers
2. Select the images
This step is crucial. When getting the images off Google, we were instructed by our AMI trainers that the images should:
- Be realistic (photos or realistic illustrations rather than cartoonish pictures preferred)
- Feature the item in its entirety and not cut it off
- Isolate the item, meaning the background should be white
- Showcase the cultural diversity in your classroom
- Be completely personalised to your child/ class, hence the need to make your own or vet purchased materials carefully
Sources:
- Online store catalogues, like Ikea’s if you are making a set of house-related classified cards. Their stock photos are all taken against white backgrounds which minimises any fiddling you have to do.
- Come Boxing Day, buy deeply discounted calendars and cut out those images. I’m already loitering around my local bookstore and making selections in my head. Muahaha.
- The Montessori Print Shop and The Montessori Company (I have not bought their materials but you bet I want to!)
Prepare the images
I’m no tech whiz so we started with good ol’ Microsoft Word (update: PowerPoint is much easier). Size it to the dimensions you like- 10cmx10cm was the recommended size but I’ve done wallet card-sized ones for travelling before…
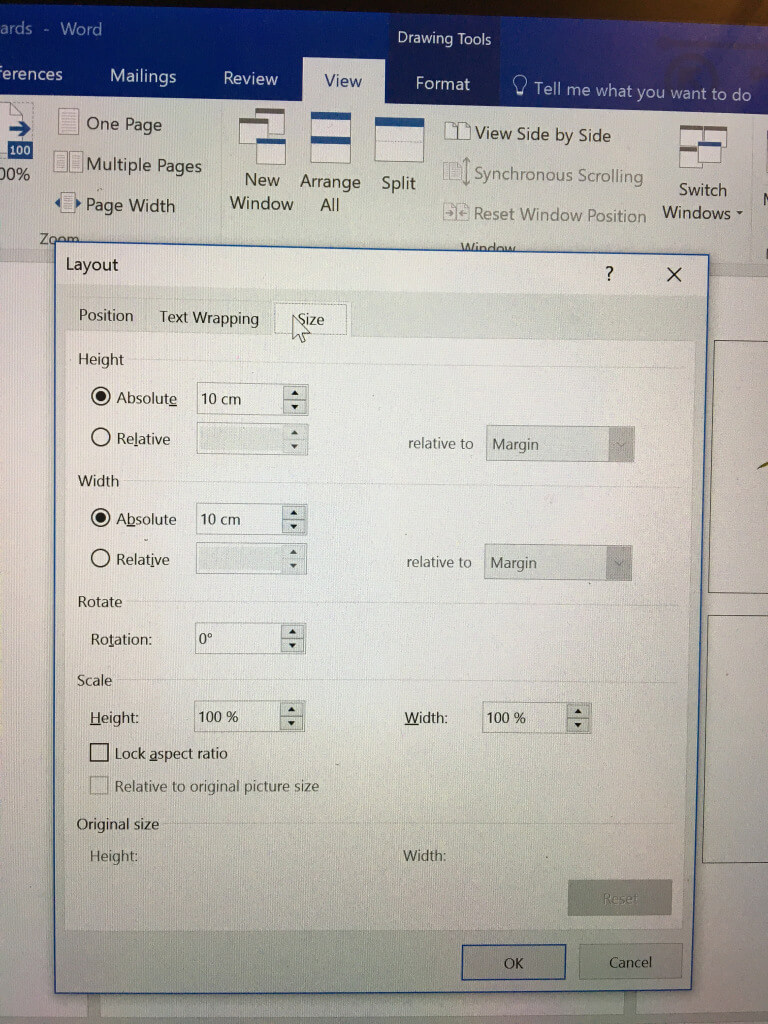
Take utmost care to size all images proportionately. Children absorb all details and it would be confusing if the chicken was as big as a horse, for example. (Sidenote: my AMI-trained friend mentioned that Montessori teachers love Schleich animal figurines, because they are proportionate to each other.)
If you cannot find an image with a white background, cut it out and paste it on white paper. It is very laborious and I would rather avoid it, but I think the cutting gives the mounted image great definition. Then again, you could probably fix this in a snap in Paint or Photoshop.
Not my preferred way of spending an afternoon, but look how defined the cut-out images are pre-gluing (I even tried to choose images facing the same direction for consistency)
Choose a font
If you are going for print, the humble Comic Sans will do.
Another option is Sassoon font, which the AMI Children’s Houses in London use.
Sassoon font is available to download for a small fee, but if you are cheapo like me, write it out by hand… or…. use the next closest font, which believe it or not, is…
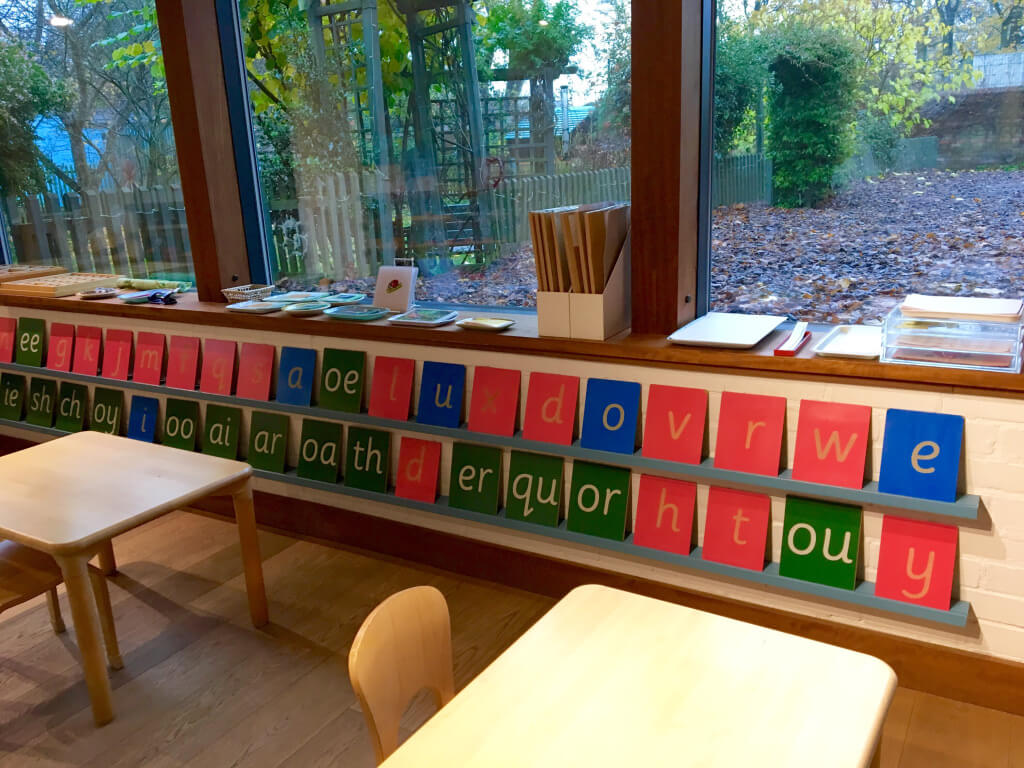
Sandpaper letters in Sassoon font, in a Children’s House
.. Lucida?! (Refer to train classified cards in previous point)
Style-wise, Sassoon sits between cursive and print, whereas Lucida has similar tails and curls as Sassoon but leans towards cursive (benefits here). These tails mimic the child’s natural writing flow and support the joining of letters without lifting the pen off the page (which is much less strenuous unlike print lettering where the pen has to be lifted after each letter).
I made these Montessori-style drawer labels by using a red pencil for consonants and blue for vowels. You could just use a regular black ink pen, but either way, writing by hand has one distinct advantage: nowadays, we mainly access writing (whether in storybooks, lessons etc) via typeface, so doing it by hand offers children a real model of what beautiful handwriting looks like.
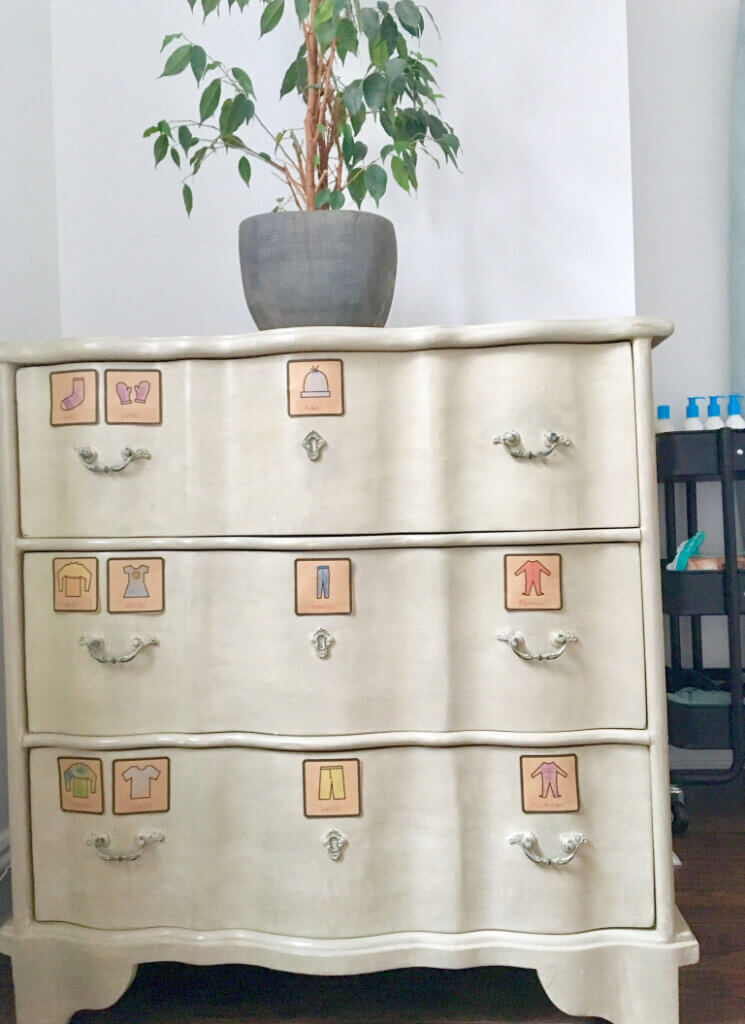
Replacing the capital letters with handwritten Sassoon small letters
Make a box
A place for everything and everything in its place. See that box in the bottom left corner? We had to make it from scratch during the course 😱 I think I will gladly shell out a couple dollars to buy a box and save myself from an hour of measuring and scoring.
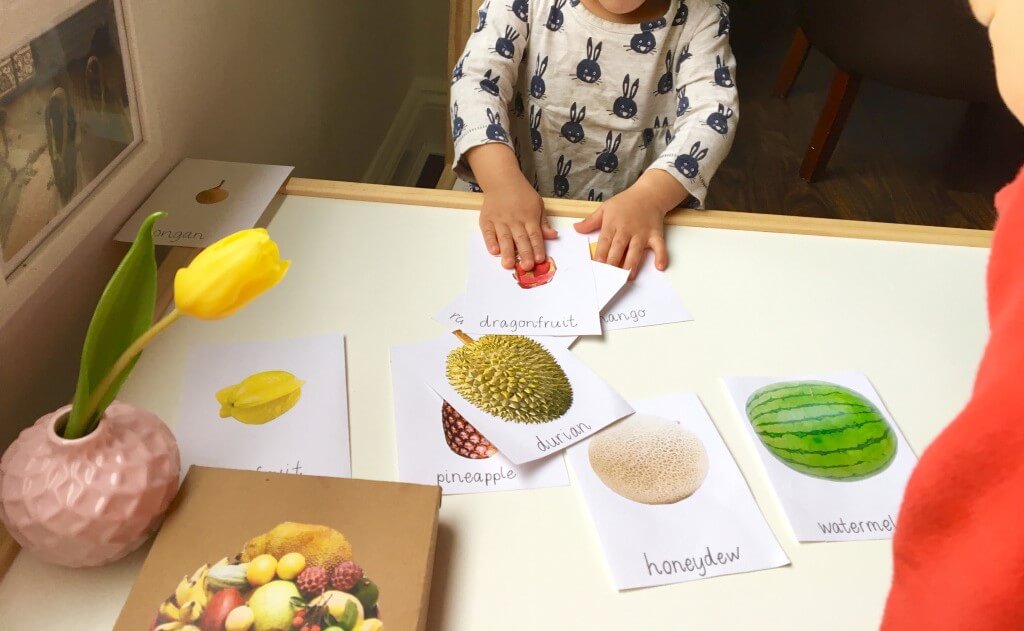
It would be nice to include a cover image on the box to clue the child into the topic. The cover image can be a composite of several items featured (e.g. a fruit platter I chose for my tropical fruit cards), or zoomed-out view of the environment (e.g. a farmhouse if your cards are of farm animals.
And finally…
Present the three-part cards
Some classified cards simply have one set of nameless images, while others have three parts (image on one card, name label, and image + name on one card) or even four (the abovementioned and one-paragraph description of the image). You may choose to:
- Invite the child to look at the cards together with a simple, “I have something to show you”
- Have a conversation while looking at the cards, in another language even! (This should be organic and conversational, a chance to build vocabulary and also assess how much the child knows so you need only focus on the less familiar nomenclature during the three-period lesson)
- Play sound games (how-to here)
- Do a three-period lesson (I feel the three-period lesson warrants a whole post so I’ll probably write about that another time)
- Leave it out on the shelf for your child to explore (Montessori teachers correct me if I’m wrong, if the three-part cards aim to impart knowledge and acquire language then a teacher should present the cards to the interested child at some point)
- Bring outdoors for nature cards or set up a Reggio-style invitation to play
And here are some unusual three-part cards..
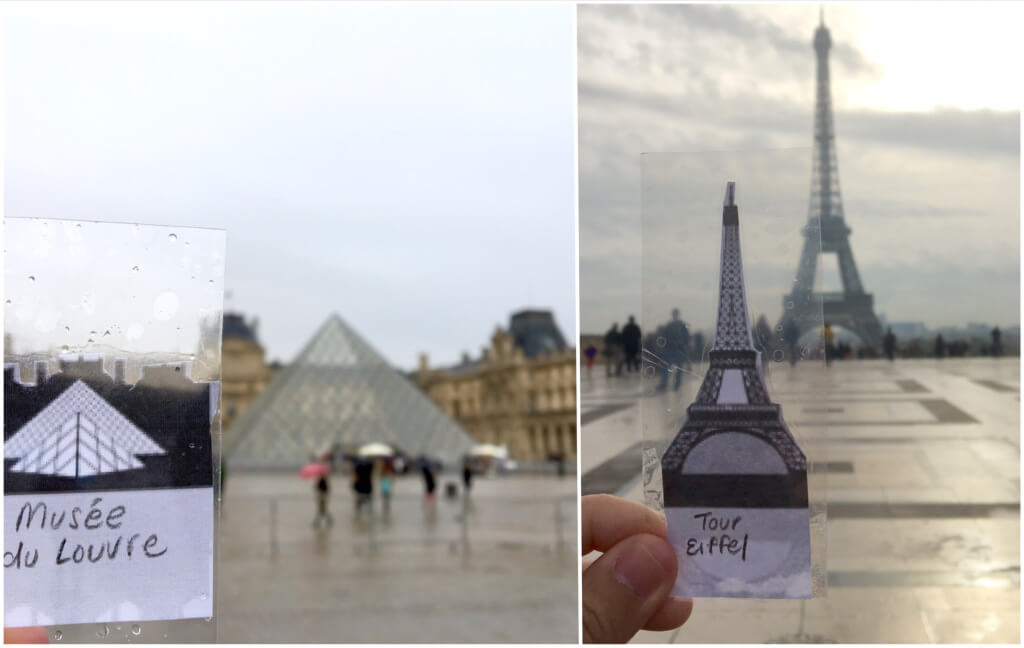
- Translucent Paris silhouette cards
More ideas for classified cards:
- Sequence cards (featuring your own child) for waking up, bedtime, brushing teeth, anything!
- Matching animal mother to animal baby cards
- Matching outside to inside cards (trains, above)
- Matching pictures to their black silhouette/ outlines/ shadows
[…] is easy enough to make my own three-part cards (tutorial here) by getting photos off Google Images, but impossible for me to paint them myself. I got these […]